Metasploit tutorial part 2: Using meterpreter
Part two of our Metasploit tutorial covers usage details of the meterpreter post-exploitation tool in Metasploit to create exploits that evade detection.
>>Get started with the Metasploit framework in the first part of the tutorial<<
In Part I of our Metasploit tutorial, we covered the basics of the Metasploit Framework (MsF), created a simple exploit on a target system, and used payloads to achieve specific results. The disadvantage of using specific payloads is that alarms may be triggered when a new process starts in the target system. Ideally, a payload should avoid creation of a new process, containing all activity within the scope of the payload itself. It should allow for writing scripts, but without creating new files on disk, since this could trigger the antivirus software.
All these drawbacks can be avoided by using meterpreter in Metasploit. Meterpreter is a post-exploitation tool based on the principle of ‘In memory DLL injection’. This circumvents the drawbacks of using specific payloads, while enabling the writing of commands and ensuring encrypted communication. DLL injection makes the target run the injected DLL by creating a new process in the target that calls the injected DLL. For this to happen, we need a DLL injector, a target system, and the DLL to be injected.
We will use the same lab setup as explained in Part I of this Metasploit tutorial. However, the payload used here is as shown in Figure 1.
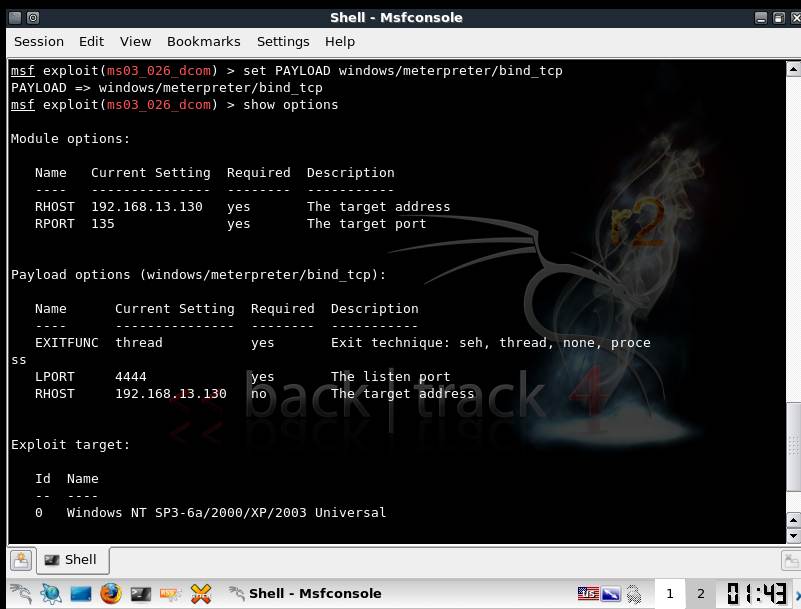
Figure 1.payload-> windows/meterpreter/bind_tcp. This will bind to port 4444 of 192.168.13.30
When exploitation is complete, we get a meterpreter console to the remote system. The actual process is described in Figure 2.
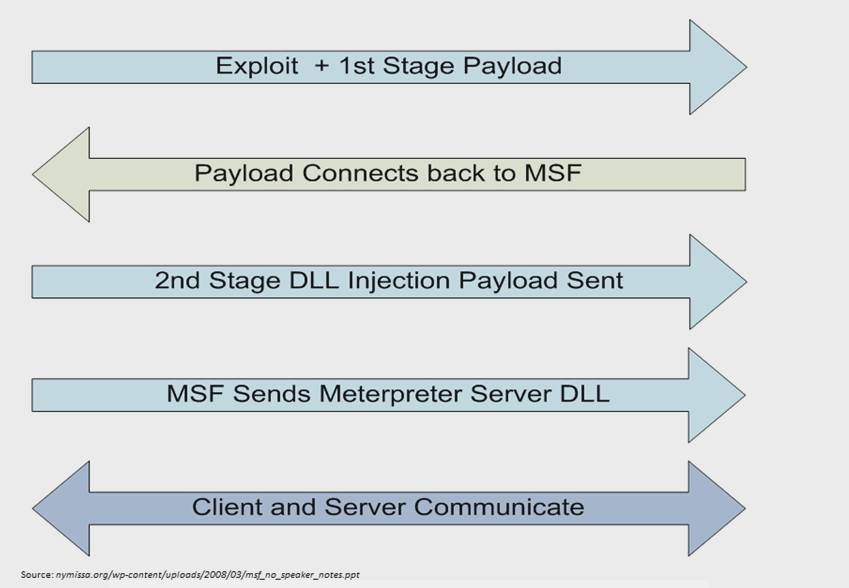
Figure 2. The Meterpreter workflow.
Meterpreter’s command set includes core commands, stdapi commands and privilege escalation commands. Figure 3 shows details of the command set available under stdapi, obtainable by typing ‘?’ in the meterpreter console.
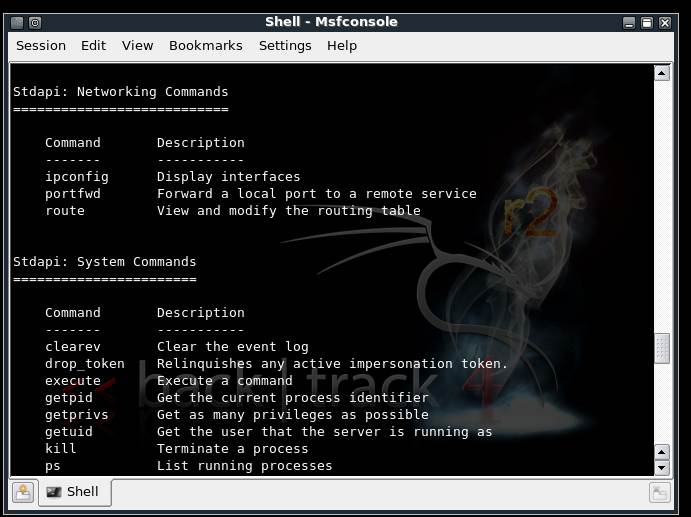
Figure 3. Stdapi networking commands and system commands
The server-side support DLL is running on the target under the stdapi module, loaded by default with meterpreter. The migrate command helps shift the work environment on the target from one process to the next. This is useful if the service on which the payload is initially bound stops unexpectedly on the remote system.
Similarly, there are networking commands and system commands that we should examine as part of this Metasploit tutorial. Keystroke capturing is easily accomplished using the stdapi UI command set. Keyscan_start starts the service, and keyscan_dump shows captured keystrokes.
Stealing windows tokens and impersonation
The Windows security model assigns every user unique SID (Security Identifier). Every thread for each user has an associated primary token which contains information on aspects like privileges and groups. Using an impersonation token, a process or thread can temporarily assume identity of some other user. Once this is used up, the thread assumes the primary token again.
Attacks based on impersonation tokens
1. Local privilege escalation
Suppose a low privilege process runs in the system that has an admin authentication, there would be an impersonation token available for the admin. Now, if an attacker breaks in using some exploit, he would have access to the impersonation token for the admin.
2. Domain privilege escalation
Here the attacker hops to other machines over the network using the impersonation token.
This can be accomplished in our Metasploit tutorial using incognito in the meterpreter console as shown in Figure 4.
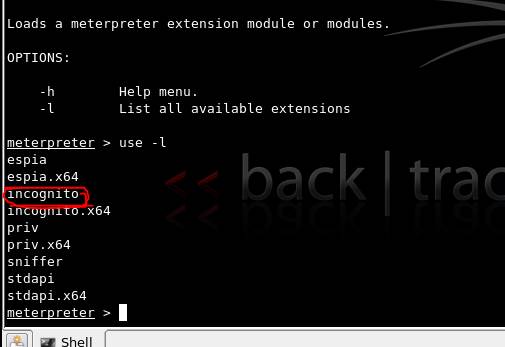
Figure 4. List of all available extensions for meterpreter, including incognito
Use commands such as list_tokens, steal_tokens and impersonate_token intuitively to carry out operations.
Client-side exploits behind firewalls
If the target is behind a firewall or NAT, the attacker must present the victim with a link that will redirect him to the attacker’s machine, which is in fact a Metasploit instance. This is required since directly probing the target is not possible.

Figure 5. The auxiliary module browser_autopwn is used to gain information about a victim behind the firewall
After setting values, type the run command. The server gets activated and exploits get loaded for different browsers.
While sending a link to the victim, it should redirect to the attacker’s Msf instance. Once the victim clicks on the link, a meterpreter session starts in the attacker’s machine, granting access to the victim’s machine.
In this second part of the Metasploit tutorial, we examined meterpreter concepts and command sets along with a scenario that could easily be tweaked to fit specific needs. Stay tuned for the next part of our Metasploit tutorial for advanced topics and concepts on the Metasploit Framework
You can follow our twitter feed at @SearchSecIN