Burp Suite Guide: Part I – Basic tools
Our Burp Suite guide series explains how to use Burp Suite for security testing of Web apps. For a start, we look at proxy, spider, site scope and sitemap.
>>Read the second part of this tutorial here<<
Burp Suite is an integration of various tools put together for performing security testing of Web applications. Burp Suite helps the penetration tester in the entire testing process from the mapping phase through to identifying vulnerabilities and exploiting them. This Burp Suite guide series will help you understand the framework and make use of the features in various scenarios.
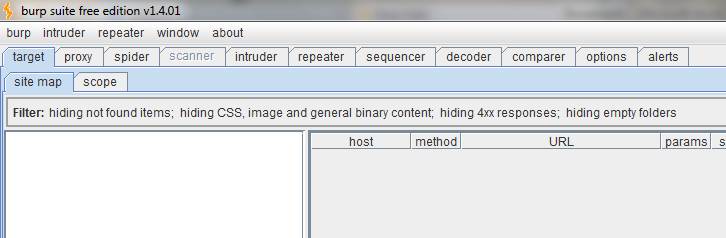
Figure 1. Burp Suite and supporting toolkit
The various features of Burp Suite are shown in Figure 1. These include proxy, spider, intruder, repeater, sequencer, decoder and comparer. As we move ahead in this Burp Suite guide, we shall learn how to make use of them seamlessly.
Burp proxy: Using Burp proxy, one can intercept the traffic between the browser and target application. This option works in similar fashion to the man-in-the-middle attack vector. To demonstrate this feature, consider the following example of a Wikipedia login form (dummyuser:dummypassword) as shown in Figure 2. First, switch the intercept mode “on” in the suite. The Forward option allows you to send the packets from the source IP to the destination IP. The Drop option allows you to drop the packet if you feel it does not need analysis.
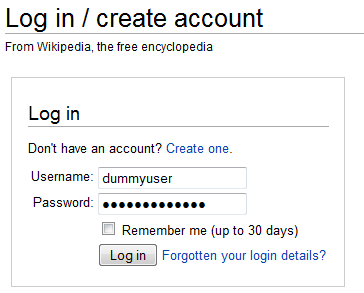
Figure 2. Wikipedia login form
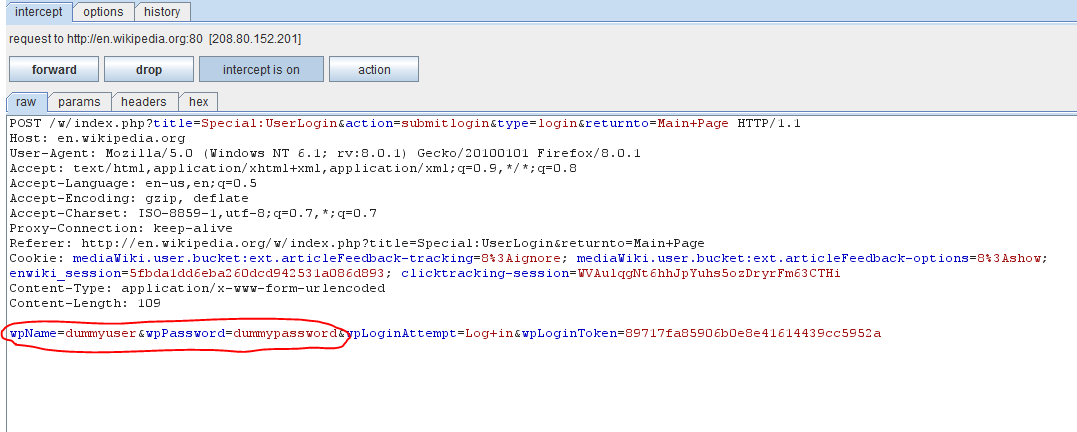
Figure 3. Intercepting login credentials with Burp proxy
Figure 3 shows the login credentials of en.wikipedia.org being captured. Note that Wikipedia uses HTTP instead of HTTPS, hence the login credentials are captured in clear text. For HTTPS we would need to use strippers such as sslstrip, as explained in previous articles.
Burp proxy captures the cookie details and HTTP headers of the page. Figure 4 and Figure 5 show the required setup to use this feature.
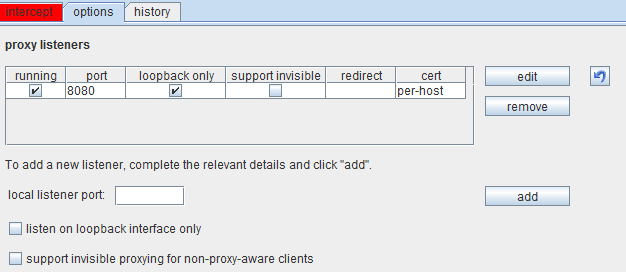
Figure 4. Options to set up prior to interception
The Burp proxy listener is enabled on Port 8080 of the local host. There are various options for intercept setup, including request methods, matching file extensions and URL scope for the client requests. Other options such as request type, content type and URL scope in the server responses are available, and can be selected based on the attack scenario.
The next step in this Burp Suite guide is to set up the browser wherein the request-response process is routed through port 8080 on a local host.
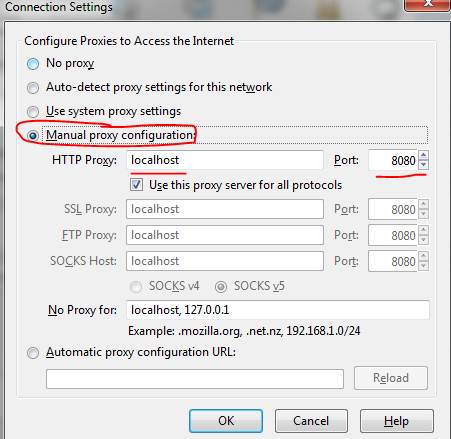
Figure 5. Browser setup
More tutorials in this series
Going forward in this Burp Suite guide, a range of different steps can be performed from this point on. The capture can be dropped, or sent to spider or sequencer or comparer. There is an option to change the request methods from GET to POST, and so on. The tool also allows for modification of headers and doing other “interesting” things with the HTTP packets in transit, which can be quite dangerous in certain scenarios.
Burp sitemap and site scope
This part of our Burp Suite guide describes how to choose the scope of the security testing. Figure 6 shows the sitemap and site scope, displaying the various sections of a particular domain. A large number of sub-domains are visible within www.google.com. Also note that visited pages are displayed in a darkened color.
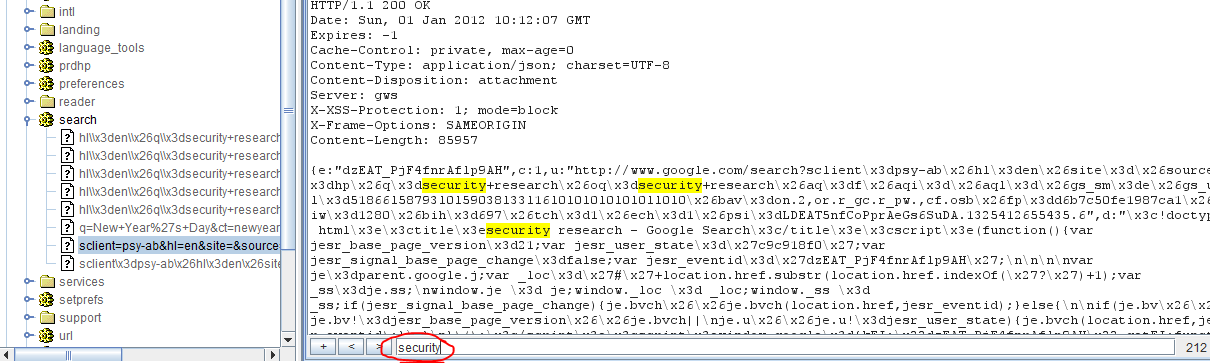
Figure 6. Sitemap, site scope and keyword search
 The screenshot in Figure 6 shows the search executed by the user using the keyword finder. In this case the search term “security” is highlighted.
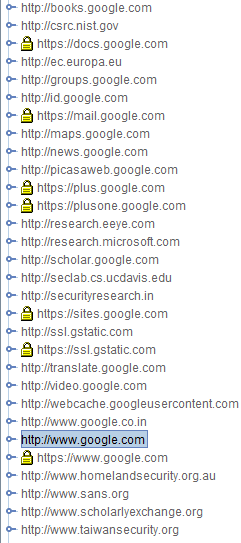
Figure 7 shows the sitemap of Google. Any subdomain of interest can be chosen for further tests, based on the pen-testing scenario. While Google has been used for this Burp Suite guide, the target Web application could be any other as required for analysis.
Burp spider: The spider tool is used to get a complete list of URLs and parameters for each site. The tool looks into each page that was manually visited and goes through every link it finds within the testing scope. When using Burp spider, ensure that the proxy and interceptors are switched off. More the links manually visited the better, as it gives the spider a larger coverage area.
For our Burp Suite guide, we will set up the spider using the Options menu. Of importance are authentication and the thread count. The authentication field can be set with the username and password combination so that when the spider comes across a login page it can automatically go through the authentication process. Figure 8 shows the Options tab of the Burp spider.
Figure 7. Google sitemap
Thread count is the number of concurrent threads that are being used. For a local testing, this count can be high. A higher thread count implies faster processing, but also a larger load.
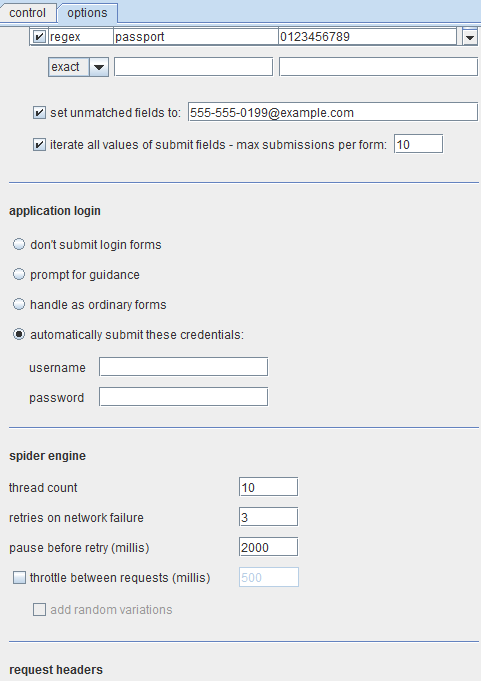
Figure 8. Burp spider Options tab
Once spidering is complete, the next step in this Burp Suite guide is to use the scanner for testing. Tests can be either active or passive. Active tests send data and analyze the possibilities. Passive tests examine all traffic and determine the vulnerabilities present in the application. Test results should always be validated, as no automated tool is perfect. Burp Suite can be used to detect SQL and XSS vulnerabilities.
>>For more on Burp repeater and intruder tools, refer to the second tutorial in this series<<
 About the author: Karthik R is a member of the NULL community. Karthik completed his training for EC-council CEH in December 2010, and is at present pursuing his final year of B.Tech in Information Technology, from National Institute of Technology, Surathkal. Karthik can be contacted on [email protected]. He blogs at http://www.epsilonlambda.wordpress.com
You can subscribe to our twitter feed at @SearchSecIN