OpenVAS how-to: Creating a vulnerability assessment report
In this OpenVAS how-to, learn how to use the free scanner to create a vulnerability assessment report and assess threat levels.
The Open Vulnerability Assessment System (OpenVAS) started life as an offshoot of the Nessus project in order to allow free development of the renowned vulnerability scanner. As Nessus has become a paid-for subscription service when used in a business environment (home users can still subscribe via a free licence), OpenVAS can be an excellent alternative vulnerability scanner for the budget-conscious organisation. In this OpenVAS how-to, we’ll cover how to create a vulnerability assessment report.
Running OpenVAS
The current incarnation of OpenVAS will only run on UNIX-like systems, and is extensively tested on Linux-based systems. The following examples and screenshots show OpenVAS running on BackTrack 5.
To install OpenVAS on BackTrack, run the following command:
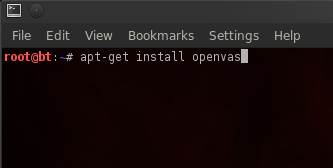 scande
Peter Giannoulis offers an excellent introductory OpenVAS tutorial on how to configure and launch your first OpenVAS scan, so we will skip the initial configuration and look at how it can be used as part of a scheduled corporate vulnerability management plan.
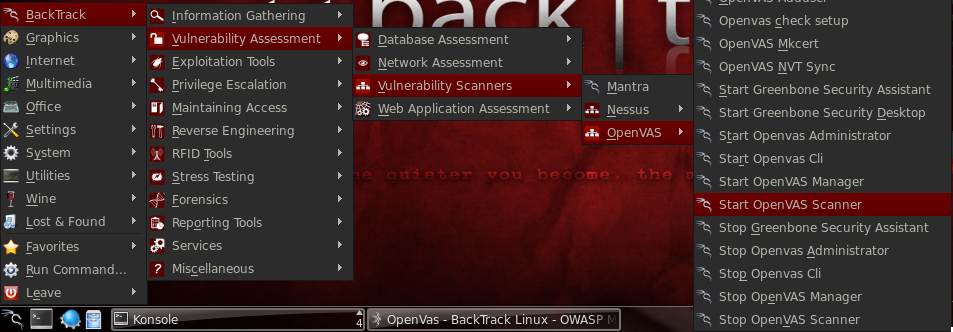
Before running OpenVAS, a few commands must be run in order to update the Network Vulnerability Tests (NVT) as well as start the server and necessary connections. To those initiated with Nessus, NVTs act in the same capacity as plugins, which are the collection of tests used by the OpenVAS scanning engine to detect vulnerabilities. First, choose the “OpenVAS NVT Sync” option within the menu, which will download the latest NVTs :
 Click to enlarge
Next, start the OpenVAS scanner; this will load any newly downloaded NVTs into OpenVAS:
 Click to enlarge
Run the following list of commands in order to start OpenVAS and the connections required:
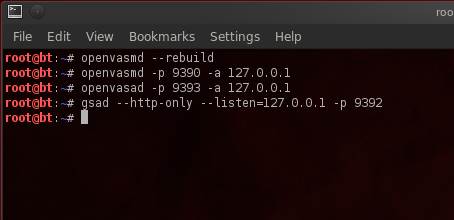
For the purposes of this article, we will connect to the scanner via the Web interface. (There are other options, however, such as a desktop client or a command-line interface, if you prefer.)
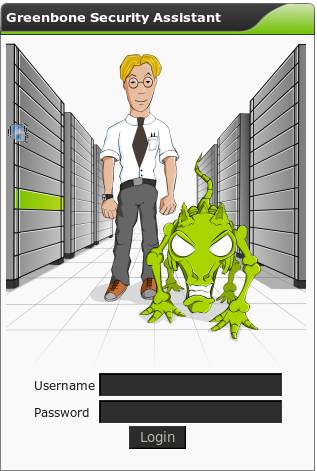
Browsing to http://172.0.0.1 will open the “Greenbone Security Assistant” with a login prompt. (For those wondering about the product integration, Greenbone Networks GmbH built the GUI interface for the OpenVAS scanner, and also offers its own hardware vulnerability scanner based on OpenVAS.) Enter the credentials you created during the initial install and configuration.
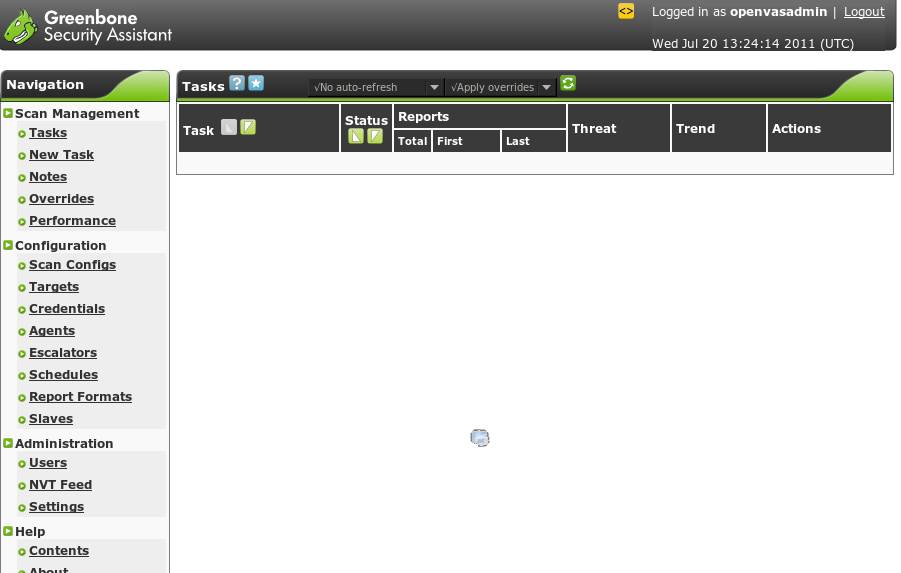
Once authenticated, the user is presented a rather nice GUI, and everything can now be controlled from here.
 Click to enlarge
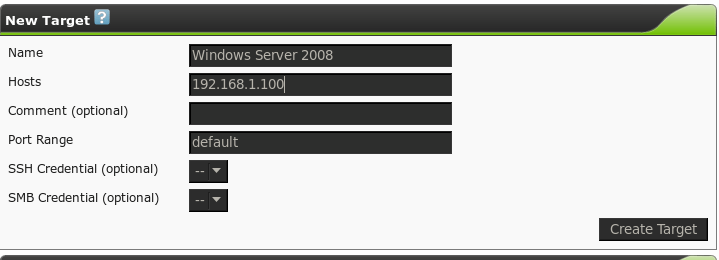
The first step is to input the targets we are going to scan. Navigating to the “Targets” link presents us with the following page:
 Click to enlarge
Here we can enter our scan targets. The “Hosts” field will accept multiple comma-separated IP addresses or hostnames. Carefully configuring target groups can allow for faster scan management. For example, keeping all your Windows servers in one group will allow you to quickly test for the latest missing patches in one scan.
We can specify credentials for the scanner to use for this group of targets, either SSH or SMB. This allows OpenVAS to conduct its “Local Security Checks” against the targets, allowing for a more comprehensive report. This report can include items that cannot be determined remotely, such as a full list of missing patches on Windows systems. Enter credentials into OpenVAS via the Credentials link.
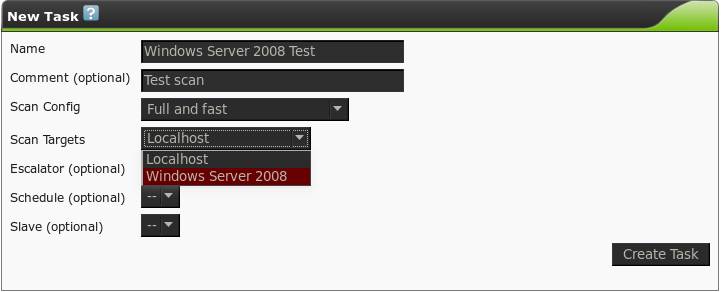
Once the host groups have been configured, we will create a new task from the “Task” link:
 Click to enlarge
Here we can choose which scan configuration to use for this task. OpenVAS has four preconfigured scan profiles, as described by OpenVAS in the following list:
- Full and fast (Most NVT's; optimized by using previously collected information.)
- Full and fast ultimate (Most NVT's including those that can stop services/hosts; optimized by using previously collected information.)
- Full and very deep (Most NVT's; don't trust previously collected information; slow.)
- Full and very deep ultimate (Most NVT's including those that can stop services/hosts; don't trust previously collected information; slow.)
When first starting, I would recommend using “Full and fast” until you get a feeling for how your network and devices react to the scanner; the expanded scan options may take considerably longer, adversely affect network performance, or cause system instability. There are also dangerous NVTs that could take devices down if you don’t know what you are doing. Custom scan configurations can be created if you so wish, through the “Scan configs” link. In this example, we will create the task using the “Full and fast” scan and the target group we created. Tasks can be scheduled to run on a regular basis as well, further easing the workload. Configure scanning schedules through the “Schedules” page, and select from the schedule drop-down when creating or editing a task.
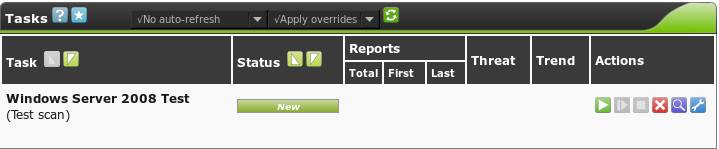
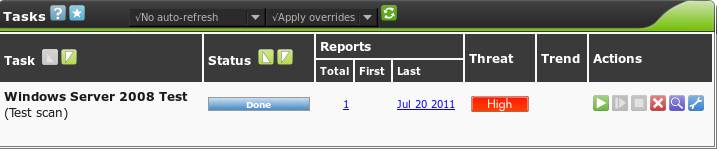
Once the task has been created, it will appear on the “Task” screen, and we are able to run our scan via the green “Play” button. It’s worth a note that, by default, the task screen will not automatically update with the scan progress; this can be configured, or you can manually refresh with the green refresh icon.
 Click to enlarge
Once the scan has finished, the task status will change to "Done", and one vulnerability assessment report is available, the last time this task was run, and what the current threat level is of the target group.
 Click to enlarge
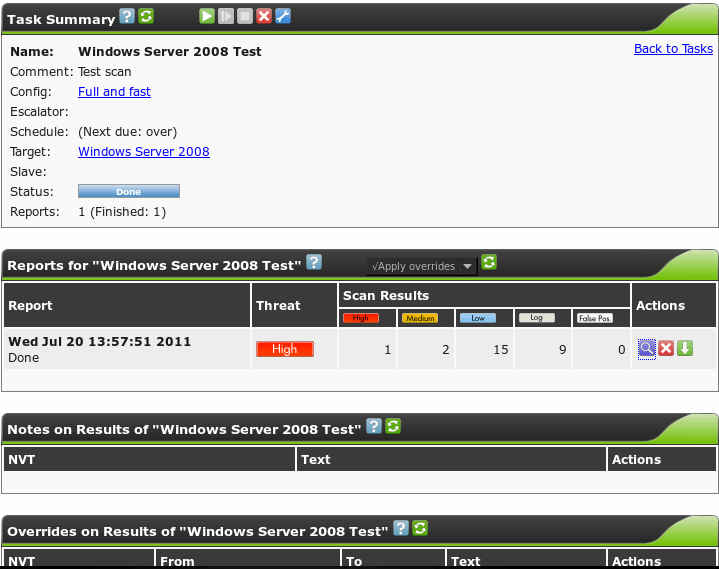
Clicking the report number will take us to the report screen:
 Click to enlarge
This page will list all the available reports for this task, showing the date and threat level again. As scans are run over time and remediation is performed, this provides an excellent visual summary of how your security stance has improved. Reports themselves can be exported from this screen via the blue magnifying glass icon. There are various report formats, including HTML, PDF and CSV. Look through each of them to see which one suits your needs best.
OpenVAS does supply a virtual appliance, which can be used with either VirtualBox or VMware for evaluation purposes. OpenVAS does not recommend scanning a large number of hosts in this manner, however, especially if the virtual machine is running on a laptop, as the scanner is resource intensive.
Summary
OpenVAS can easily be configured to scan an entire network estate on a regular basis and produce reports in various formats to suit your needs. The excellent accompanying documentation can be accessed through the numerous “?” icons on every page, easing the learning curve of the scanner system. Try it out; it is free and to date there are in excess of 20,000 ready-to-use NVTs, which rival many of the commercial scanners out there.
About the author:
Mike McLaughlin is a penetration tester working for First Base Technologies, an information security consultancy in the UK. Mike's daily work consists of both internal and external network based penetration testing, Web application penetration testing, and social engineering.